1. POD
1.1. POD 생성
※ namespace 확인

※ pod 생성 (namespace를 따로 지정하지 않을 경우 default로 생성됨)
# kubectl run nginx-app --image=nginx --port 80
※ default pod 확인 (namespace를 따로 지정하지 않을 경우 default의 pod 출력)

※ namespace 생성

※ 위에서 생성한 1team namespace에 nginx-app1이라는 pod 생성
# kubectl run nginx-app1 --image nginx --port 80 --namespace 1team
※ 1team의 pod 확인

※ 모든 namespace의 pod 확인

1.2. POD 삭제
※ default의 nginx-app POD 삭제
# kubectl delete pod nginx-app
※ 1team의 nginx-app1 POD 삭제
# kubectl delete pod nginx-app1 --namespace 1team
※ 1team namespace 삭제 (namespace를 삭제할 경우 그 안의 POD까지 모두 삭제됨)
# kubectl delete namespace 1team
2. yaml 파일
2.1. namespace 생성
※ 1team namespace를 생성하는 name.yml 파일 생성
# vi name.yml

apiVersion: v1
kind: namespace
metadata:
 name: 1team
※ 파일 apply
# kubectl apply -f name.yml
※ name.yml 파일에 내용 추가
# vi name.yml

apiVersion: v1
kind: Namespace
metadata:
 name: 1team
---
apiVersion: v1
kind: Namespace
metadata:
 name: 2team
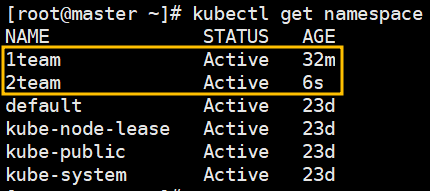
※ 수정한 yaml 파일 apply

※ namespace 생성 확인
2.2. nginx POD 생성
※ namespace 1team에 nginx pod를 생성하는 yaml 파일 생성
# vi nginx.yml

apiVersion: v1
kind: Pod
metadata:
 name: nginx
 namespace: 1team
spec:
 containers:
 - name: nginx
   image: nginx
   ports:
    - containerPort: 80
※ 생성한 yaml 파일 apply하여 pod 생성

※ yaml 파일로 생성된 pod 삭제

2.3. apache POD 생성
※ command로 apache pod 생성
# kubectl run apache --image httpd --port 80
※ apache pod 실행을 yaml 파일로 작성
# vi apache.yml

apiVersion: v1
kind: Pod
metadata:
 name: apache-app
 namespace: 2team
spec:
 containers:
 - name: apache
   image: httpd
   ports:
    - containerPort: 80
※ 실행 전에 위에서 생성한 apache POD 삭제 후 실행
# kubectl delete pod apache
# kubectl apply -f apache.yml
※ 생성된 pod 확인

'Kubernetes' 카테고리의 다른 글
| 2. Kubernetes : node 연결 (0) | 2022.07.27 |
|---|
