1. 실습 환경 구성
| Instance | BastionServer | WEB-A | WEB-C | DB-A | DB-C |
| public IP | 43.200.44.44 | 43.200.9.105 | 3.39.33.228 | ||
| private IP | 10.0.0.183 | 10.0.0.151 | 10.0.1.85 | 10.0.2.16 | 10.0.3.215 |
위와 같이 인스턴스 5대를 생성한다.
2. WEB-A 설정
2.1. WEB-A Wordpress 설치 및 설정
WEB-A 인스턴스에서 작업을 진행한다.
※ root 로그인
$ sudo su -
※ httpd, wget 설치
# yum install -y httpd wget
※ wordpress archive 파일 받아오기
# wget https://ko.wordpress.org/latest-ko_KR.tar.gz
※ archive 파일 압축 해제
# tar xvfz latest-ko_KR.tar.gz
※ 압축 해제한 디렉터리 아래에있는 파일들 /var/www/html 아래로 복사
# cp -a wordpress/* /var/www/html/
※ /var/www/html 아래에 있는 파일 소유자, 그룹 변경
# chown apache.apache /var/www/html/*
※ 웹 시작 페이지 변경
# vi /etc/httpd/conf/httpd.conf
※ wordpress 설정 샘플 파일 복사하여 설정 파일 생성
# cp /var/www/html/wp-config-sample.php /var/www/html/wp-config.php
※ 설정 파일 수정
# vi /var/www/html/wp-config.php
※ 웹 서버 상태 확인을 위한 html 파일 생성
# vi /var/www/html/health.html
※ 위에서 생성한 html파일로 웹 서버 접속해 보기
정상적으로 접속됐다면 웹 서버에는 문제가 없다!

2.2. WEB-A Wordpress DB 설정
WEB-A의 Wordpress와 연결할 DB를 설정한다.
DB-A 인스턴스에서 작업 진행
※ mysql 접속

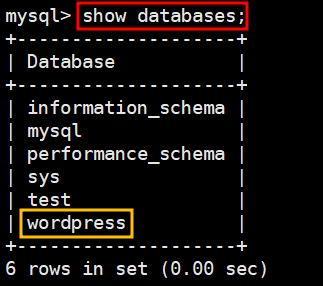
※ wordpress DB 생성
mysql> create database wordpress;
※ database 생성 확인
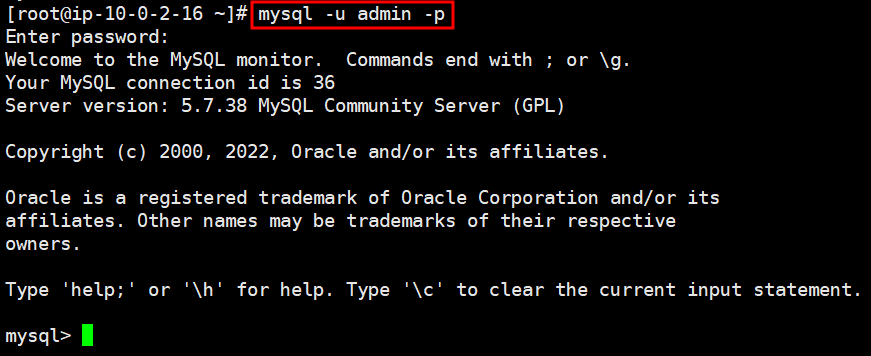
※ admin 사용자 생성 및 권한 부여
mysql> create user admin identified by 'It12345!!';
mysql> grant all privileges on wordpress.* to 'admin'@'%' identified by 'It12345!!'

mysql> quit
※ 생성한 admin 사용자로 로그인
※ wordpress DB가 출력되는지 확인

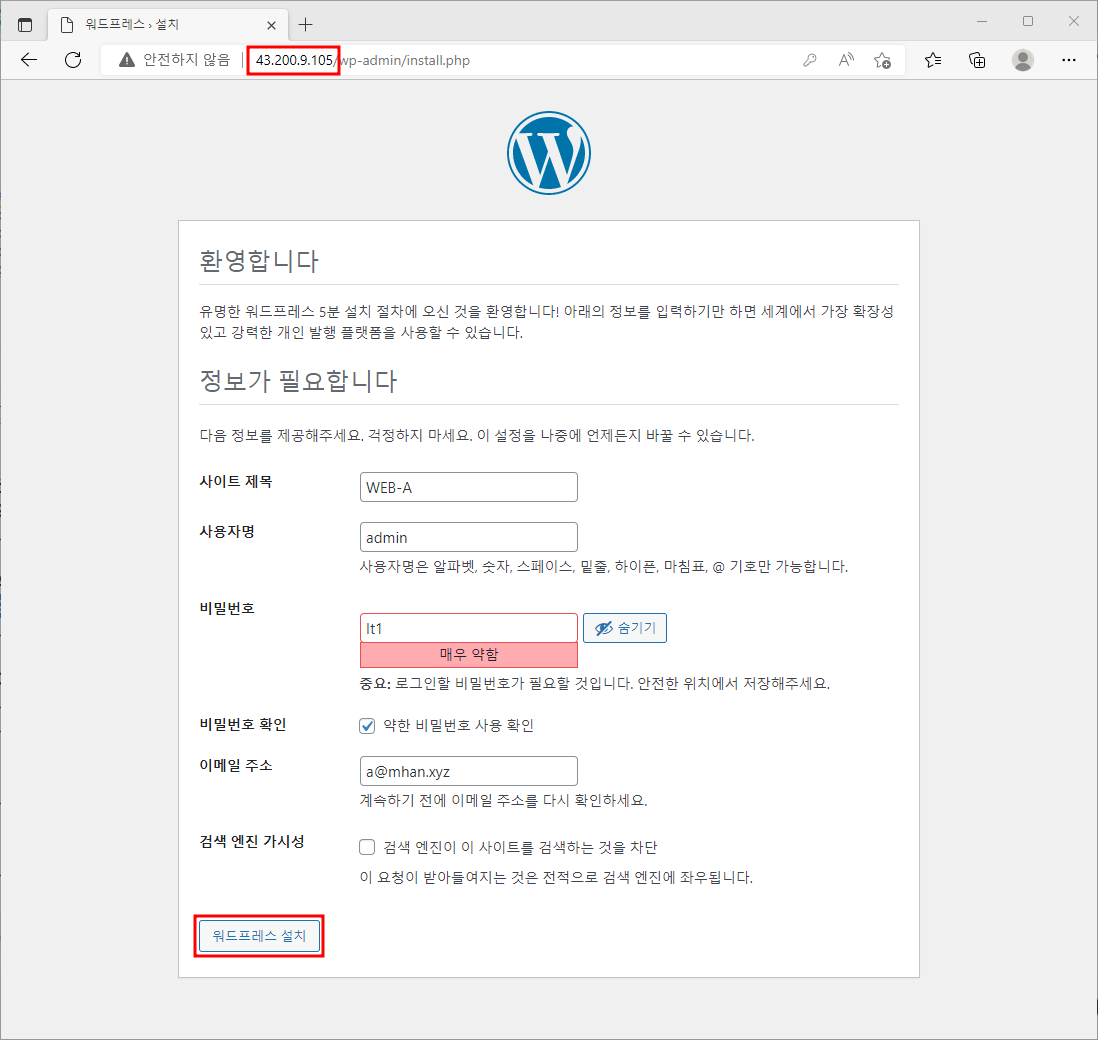
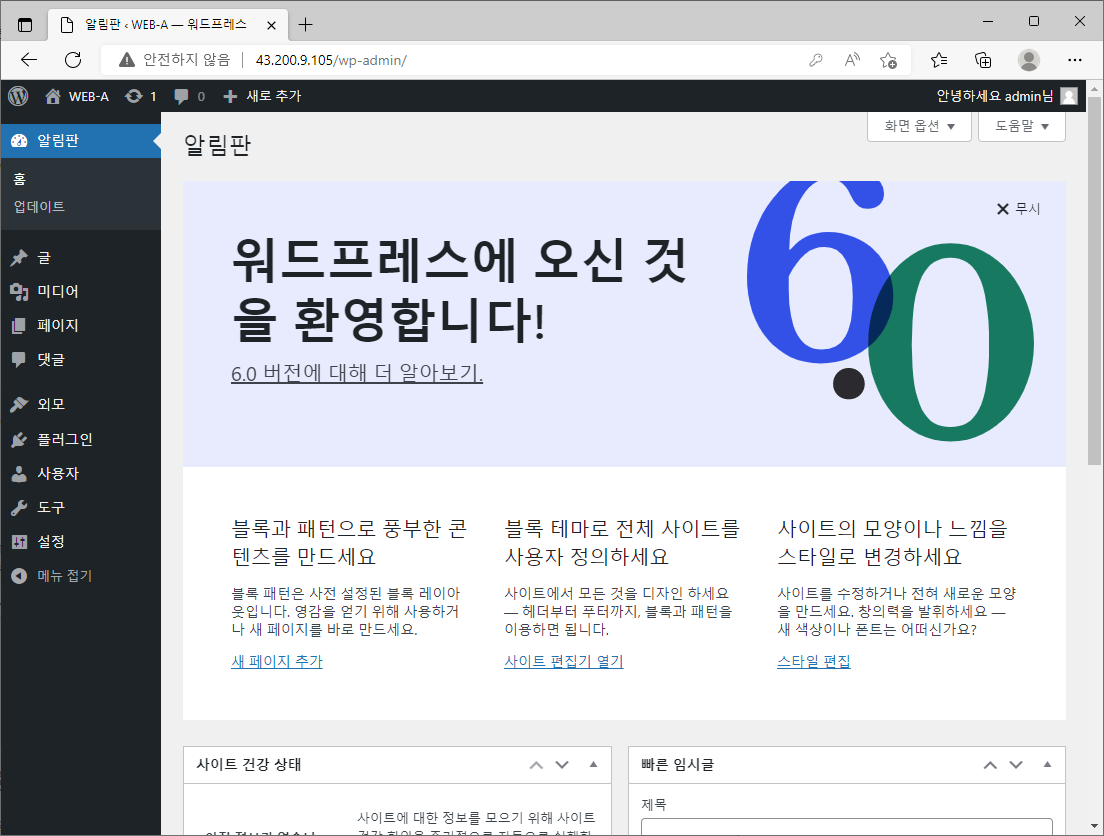
※ 웹 브라우저에서 public IP 입력하여 접속 후 wordpress 설치 진행
3. WEB-C 설정
3.1. WEB-C Wordpress 설치 및 설정
WEB-A 인스턴스에는 직접 수동으로 wordpress 설치를 진행했다면 WEB-C 인스턴스에는 아래 스크립트를 이용하여 wordpress 설치 진행해보자.
※ root 로드인 후 wordpress.sh 스크립트 작성
$ sudo su -
# vi wordpress.sh
스크립트로 작성 php와 mariadb는 이미 설치되어 있으므로 주석처리한다.
#! /bin/bash

#yum install -y wget httpd
#amazon-linux-extras enable lamp-mariadb10.2-php7.2
#yum install -y php-cli php-pdo php-fpm php-json php-mysqlnd mariadb php

wget https://ko.wordpress.org/latest-ko_KR.tar.gz
tar zxvf latest-ko_KR.tar.gz
cp -a wordpress/* /var/www/html/

sed -i 's/DirectoryIndex index.html/DirectoryIndex index.php/g' /etc/httpd/conf/httpd.conf
chown apache.apache /var/www/html/*

cp /var/www/html/wp-config-sample.php /var/www/html/wp-config.php
sed -i 's/database_name_here/wordpress/g' /var/www/html/wp-config.php
sed -i 's/username_here/admin/g' /var/www/html/wp-config.php
sed -i 's/password_here/It12345!!/g' /var/www/html/wp-config.php
sed -i 's/localhost/10.0.3.215/g' /var/www/html/wp-config.php

cat > /var/www/html/health.html << EOF
<html><body><h1>MHAN WEB SERVER-2_health</h1></body></html>
EOF

systemctl enable httpd
systemctl start httpd
※ 작성한 스크립트 파일에 실행 권한 부여 후 실행
$ chmod 777 wordpress.sh
$ ./wordpress.sh
※ 웹 브라우저에서 health.html 파일 이용하여 접속
정상적으로 접속 된다면 웹 서버가 정상적으로 떴다는 의미이다.

※ 웹 브라우저에 publicIP 입력하여 접속 후 워드프레스 설치

Reference.
https://virtualtech.tistory.com/146
Terraform : 18. user_data create
음. 그런데 Terraform을 이용해서 저희가 완전 자동화로 구축을 하고 싶은 것은 wordpress + db Connection 입니다. 그렇다면 EC2를 생성 시 user_data를 작성해서 코드에 삽입을 해야 했습니다. 바로 그 user_dat
virtualtech.tistory.com
'Cloud > AWS' 카테고리의 다른 글
| 12. AWS : RDS (Relational Database Service) (0) | 2022.06.28 |
|---|---|
| 11. AWS : EC2(Instance) - mariaDB 설치 (0) | 2022.06.28 |
| 9. AWS : S3 - Amazon S3 (0) | 2022.06.28 |
| 8. AWS : Amazon EBS 볼륨 (0) | 2022.06.28 |
| 7. AWS : LoadBalance (0) | 2022.06.28 |


