아래 문제의 모든 작업을 쉘 스크립트로 작성하여 자동화 환경을 구성해보자.
- Docker 설치 및 실행
- httpd 및 nginx, centos:7, alpine 이미지 다운로드
- bridge network 생성
- N1 192.168.11.0/24 192.168.11.254
- N2 192.168.12.0/24 192.168.12.254
- index.html과 index1.html 만들기
- index.html, Container-WEBSERVER-1과 Ncloud Image 출력
- index1.html, Container-WEBSERVER-2와 Ncloud Image 출력
- Container 생성
- 네트워크 N1에 http 웹 사이트 생성, 컨테이너 이름은 h1, 출력 내용은 index.html
- 네트워크 N2에 nginx 웹 사이트 생성, 컨테이너 이름은 n1, 출력 내용은 index1.html
- haproxy 설치
- Host PC의 80 port로 서비스
- 페이지 새로고침 시 컨테이너 h1과 컨테이너 n1의 내용이 교체 출력 되어야 합니다.
# vi docker.sh
#! /bin/bash

# Install package
yum install -y yum-utils

# Setting Repository
yum-config-manager --add-repo https://download.docker.com/linux/centos/docker-ce.repo

# Install Docker CE
yum install -y docker-ce docker-ce-cli containerd.io

# Start docker
systemctl start docker
systemctl enable docker

# Image Download
docker pull httpd
docker pull nginx
docker pull alpine
docker pull centos:7

# Create Network
docker network create --subnet 192.168.11.0/24 --gateway 192.168.11.254 N1
docker network create --subnet 192.168.12.0/24 --gateway 192.168.12.254 N2

# Create index.html
cat > index.html << EOF
<html>
<body>
<h1>Container-WEBSERVER-1</h1>
<img src="이미지url">
</body>
</html>
EOF

# Create index1.html
cat > index1.html << EOF
<html>
<body>
<h1>Container-WEBSERVER-2</h1>
<img src="이미지url">
</body>
</html>
EOF


# Set h1 Container
docker run -itd --net N1 --name h1 httpd
docker cp index.html h1:/usr/local/apache2/htdocs/index.html
curl 192.168.11.1

# Set h2 Container
docker run -itd --net N2 --name n1 nginx
docker cp index1.html n1:/usr/share/nginx/html/index.html
curl 192.168.12.1

# Install haproxy
yum install -y haproxy

# Set haproxy.cfg
sed -i 's/5000/80/g' /etc/haproxy/haproxy.cfg
sed -i 's/127.0.0.1:5001/192.168.11.1:80/g' /etc/haproxy/haproxy.cfg
sed -i 's/127.0.0.1:5002/192.168.12.1:80/g' /etc/haproxy/haproxy.cfg

# Start haproxy
systemctl restart haproxy

# Set Firewall
firewall-cmd --permanent --add-port=80/tcp
firewall-cmd --reload
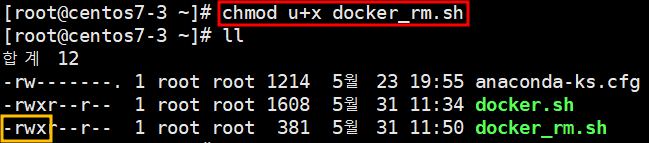
# vi docker_rm.sh
#! /bin/bash

# Reset Firewall
firewall-cmd --permanent --remove-port=80/tcp
firewall-cmd --reload

# Remove Docker - Process, Network, Image
docker rm -f $(docker ps -aq)
docker network rm N1 N2
docker rmi $(docker images -aq)

# Remove html File
rm -rf index.html
rm -rf index1.html

# Stop Service
systemctl stop haproxy
systemctl stop docker

# Remove haproxy
rm -rf /etc/haproxy/haproxy.cfg
yum remove -y haproxy

# Remove docker
yum remove -y docker-ce docker-ce-cli containerd.io
rm -rf /etc/yum.repos.d/docker-ce.repo
yum remove -y yum-utils
diff 명령어
diff 파일1 파일2
'Linux > Docker' 카테고리의 다른 글
| 36. CentOS7 : Docker - MySql (0) | 2022.06.07 |
|---|---|
| 35. CentOS7 : Docker - Container Link (0) | 2022.06.07 |
| 33. CentOS7 : Container를 이용하여 Load Balancer 환경 구성 (0) | 2022.06.07 |
| 32. CentOS7 : Docker Network (0) | 2022.06.07 |
| 31. CentOS7 : Docker - 컨테이너 내부 파일 변경(docker cp, volume, 바인드 마운트 (0) | 2022.06.07 |


